
How Wide Must an Escape Route Be Kept Clear, and How Is It Marked?
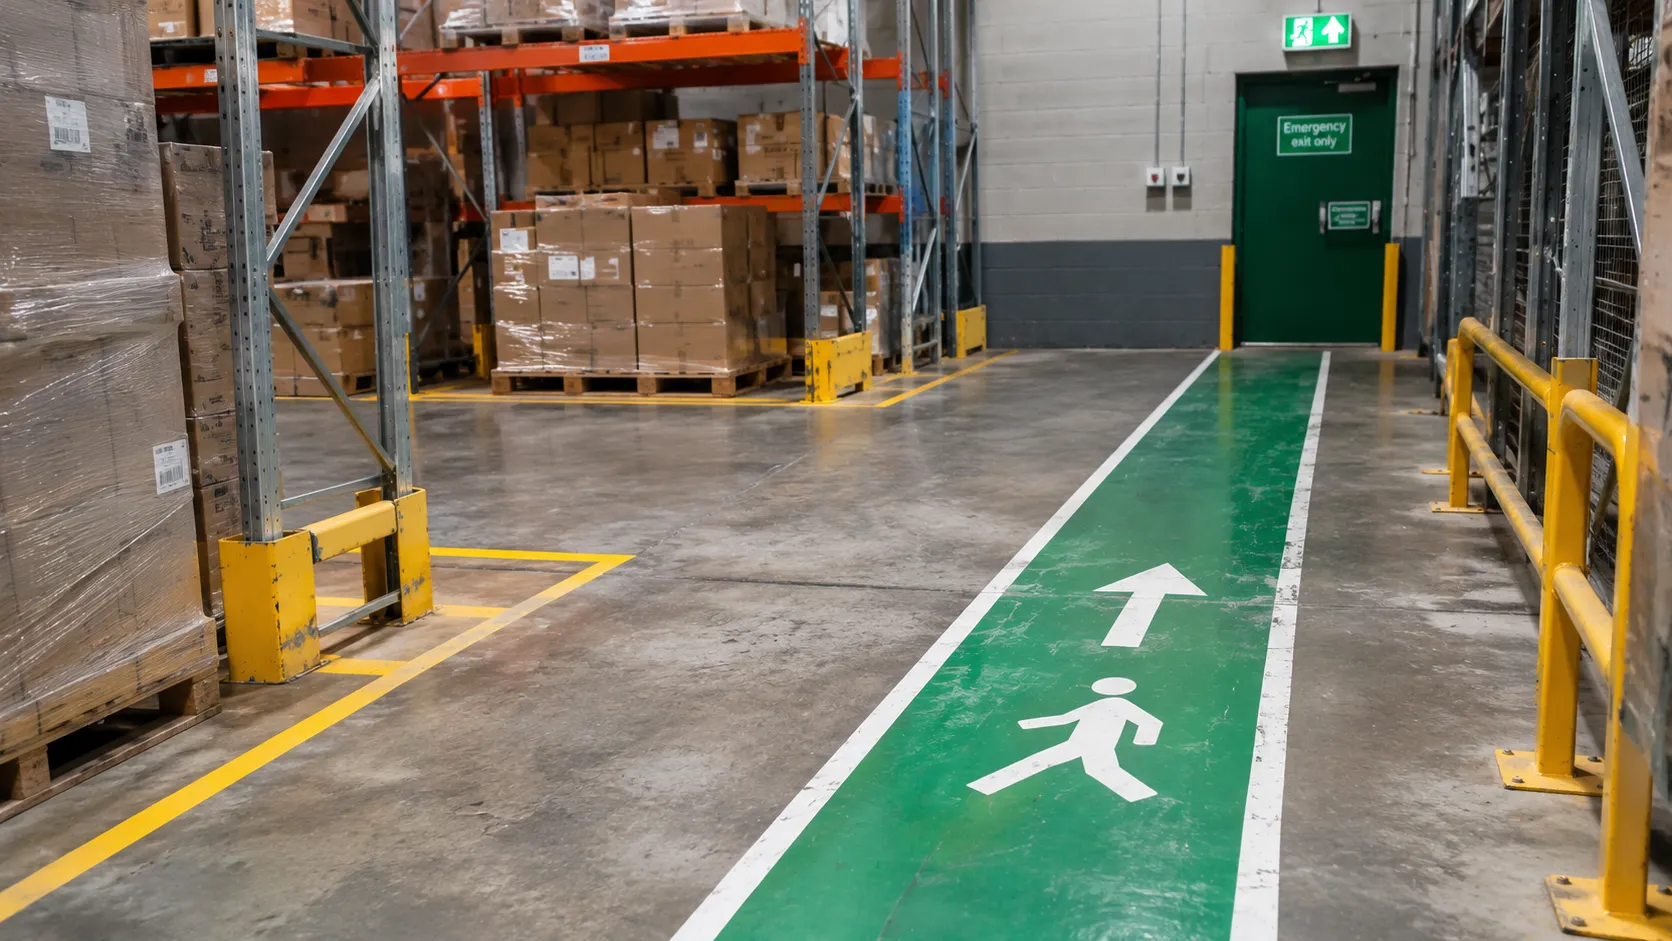
An escape route must be kept clear along its whole length to a minimum unobstructed width, commonly 1,000mm for general use and not less than 800mm for the lowest-occupancy routes, with wider minimums as occupancy rises. On the floor this is held with marked keep-clear zones and demarcated walkways, using ISO 7010 safety colours: green for the escape route and safe condition, red to mark firefighting equipment that must not be blocked.
How wide must an escape route be kept clear?
An escape route has a required clear width that must stay unobstructed for its full length, so people can leave quickly in an emergency. The exact minimum depends on how many people the route serves, and it is a floor-level obligation as much as a design one: stock, pallets, bins and parked equipment that narrow the route defeat it. The figures below are common minimum clear widths used as a planning guide.
| Route serves | Minimum clear width (guide) | Notes |
|---|---|---|
| Up to ~50 people | 800 mm | Lowest-occupancy routes, absolute minimum |
| General escape route | 1,000 mm | Common minimum for everyday workplace routes |
| Higher occupancy | 1,200 mm and up | Width increases with the number served |
| Pinch points / doorways | Maintain the route width | Obstructions at doors are a common failure |
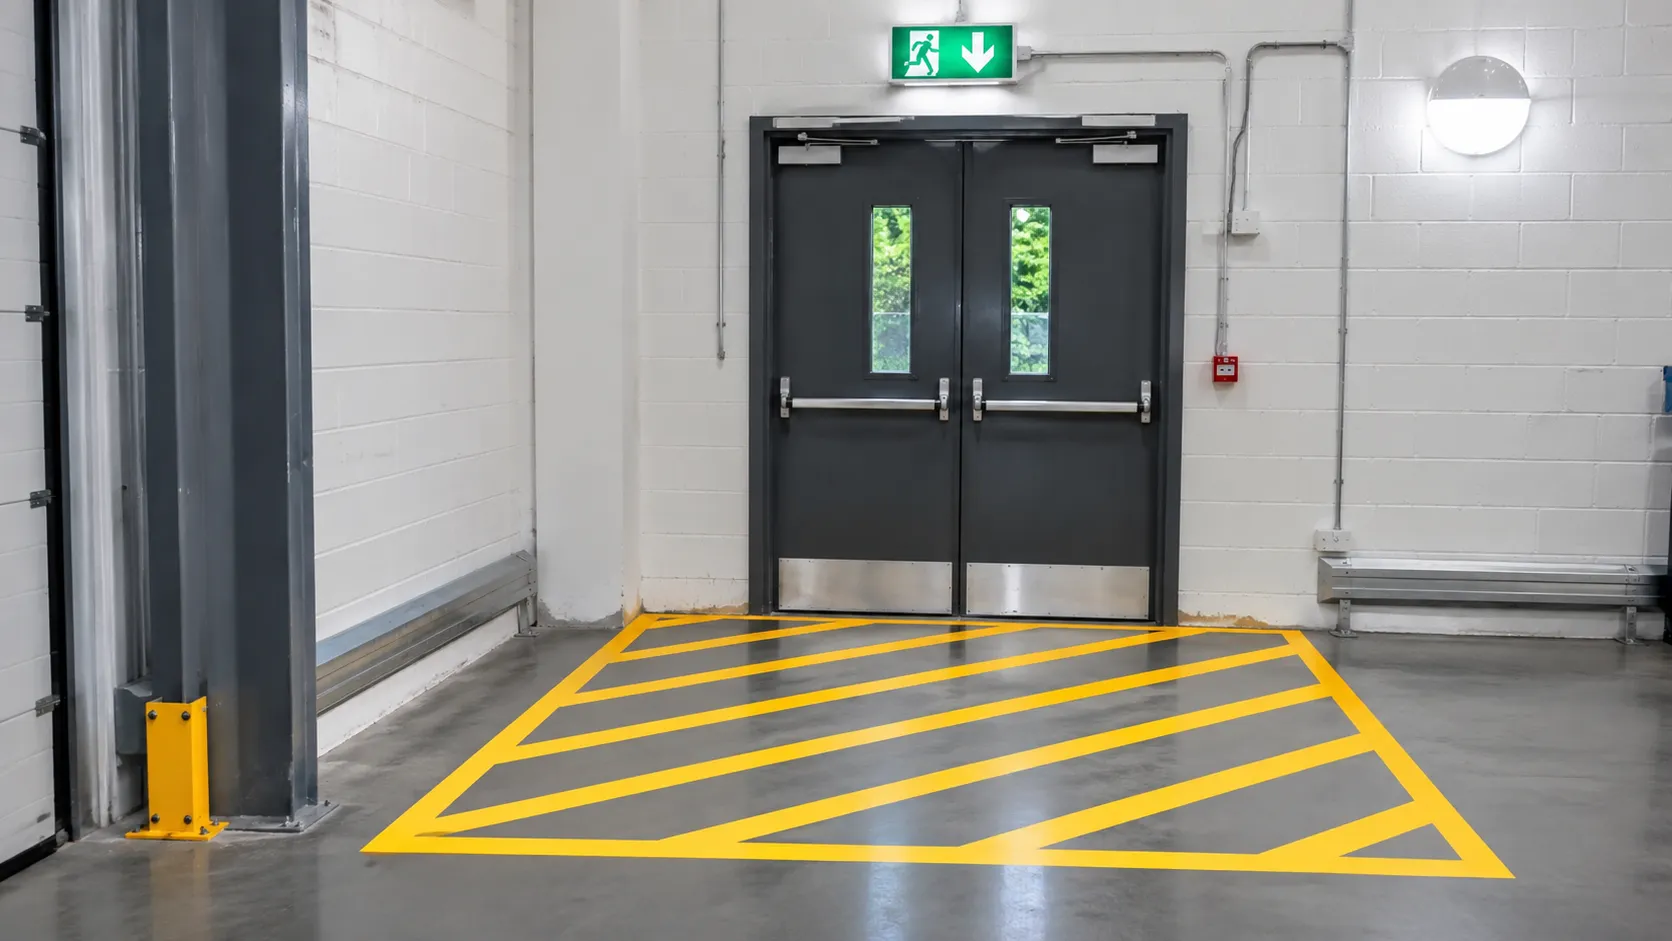
| Keep-clear at final exits | Full width, both sides | No storage either side of an exit door |
Indicative minimum clear widths; confirm the figure for your building and occupancy against the current fire guidance (TGD B).
The width is a minimum to be maintained, not a target to design to and then fill. A 1,000mm route with a pallet parked halfway across is a 400mm route in practice.
Do stairs and final exits differ from corridors?
Yes, the route is only as good as its narrowest point, and that point is often a stair or a doorway. A horizontal corridor, a stairway and a final exit door each have to carry the required width, and the calculation is based on the number of people that part of the route serves, which can be higher at a stair that gathers several corridors. Floor marking has to carry the clear width through all of them, holding it at the head and foot of stairs and across door thresholds, not just along the easy straight runs.
How is an escape route marked on the floor?
Floor marking makes the required clear route visible and self-policing, so obstructions are obvious before they become a hazard. The common techniques are:
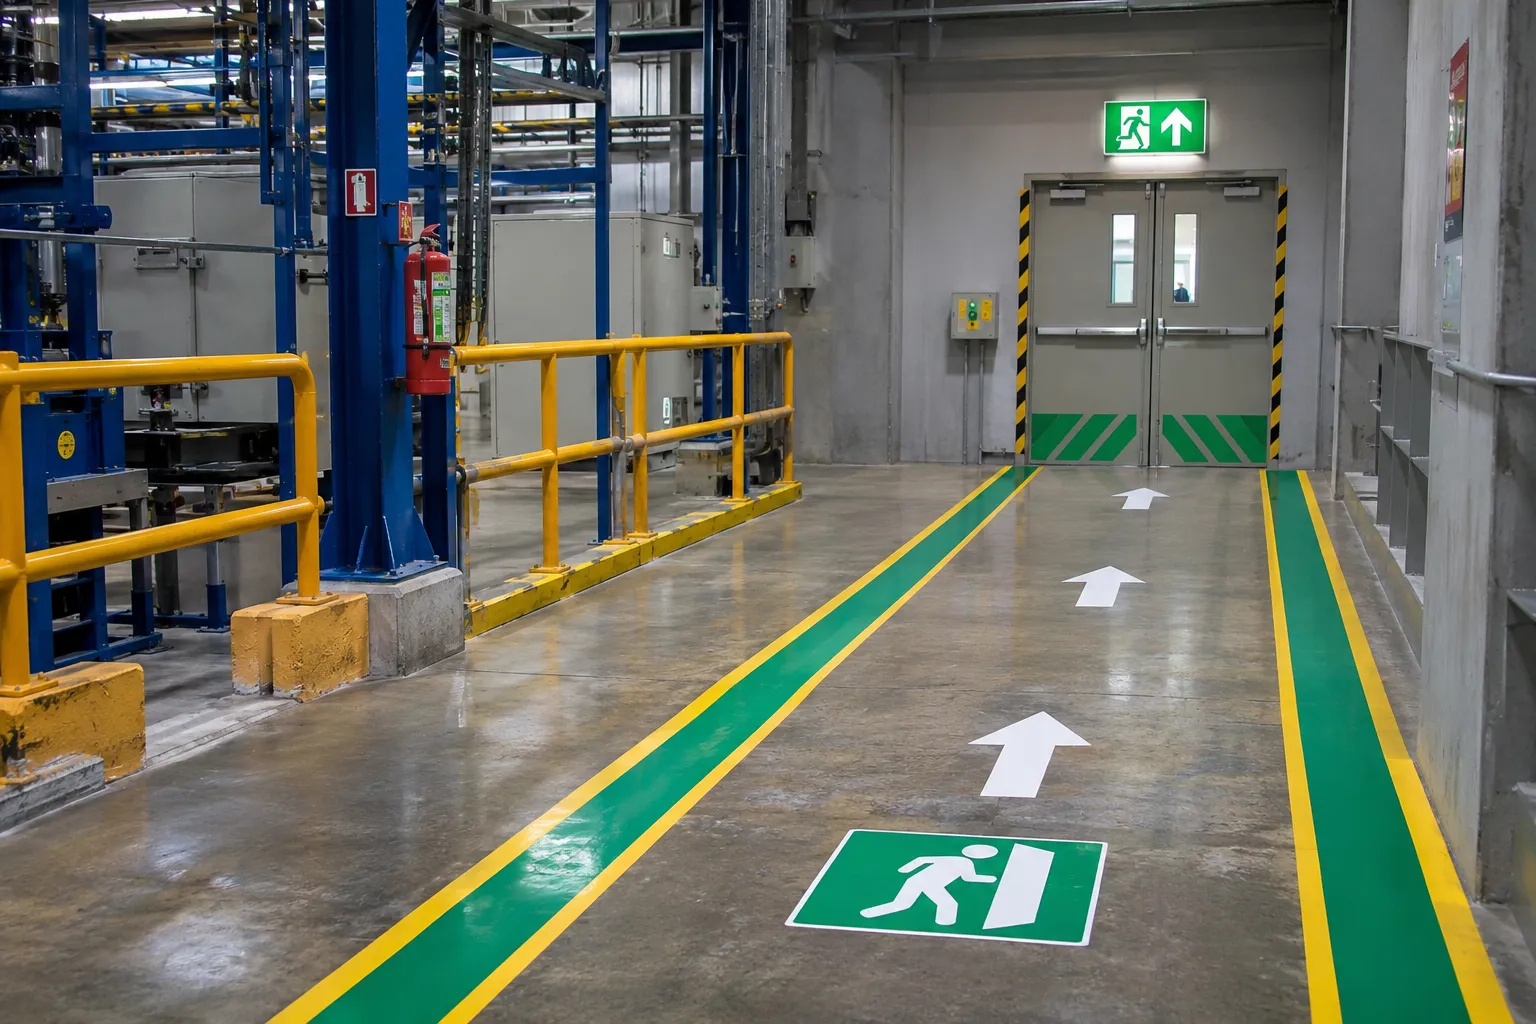
- Demarcation lines, typically 50 to 100mm wide, defining the walkway or escape route edges, so the clear width is drawn on the floor.
- Hatched keep-clear zones at final exits, in front of fire doors and around firefighting equipment, which must never be stored on or blocked.
- Directional arrows along the floor showing the route to the exit, complementing the signage above.
- Contrasting colour at pinch points and door thresholds to keep attention on the clear path.
This is floor-level demarcation of the route and keep-clear areas; it works alongside the wall-mounted and overhead safety signs, which are a separate system.
Which ISO 7010 colours apply on the floor?
Safety colours carry meaning, and ISO 7010 sets them so a marking reads the same anywhere. Used on the floor for routes and equipment zones, the key ones are:
| Colour | ISO 7010 meaning | Floor-marking use |
|---|---|---|
| Green | Safe condition / escape | Escape routes, safe areas, first-aid points |
| Red | Fire / prohibition | Keep-clear zones at firefighting equipment |
| Yellow | Caution / risk | Hazard-edge and caution zones near routes |
| Blue | Mandatory action | Where a mandatory instruction applies to a zone |
ISO 7010 safety colours as applied to floor marking of routes and equipment zones.
What keep-clear distances apply to equipment?
The escape route is not the only thing that has to stay clear, and floor marking is the usual way to hold the space. Common keep-clear zones include:
- Firefighting equipment: extinguishers, hose reels and fire blankets need an unobstructed approach so they can be reached in seconds.
- Electrical panels and switchgear: a clear working space in front, commonly around one metre, so the equipment can be operated and isolated safely.
- Fire doors: kept clear on both sides so they can swing fully and are never wedged or blocked.
- Pedestrian and vehicle segregation: marked walkways keeping people clear of forklift and traffic routes that cross or run alongside the escape route.
How durable does the marking need to be, and how is it maintained?
Floor marking only works while it is intact, and an escape route is usually a high-traffic area, so durability matters. Marking has to survive foot and vehicle traffic and cleaning without fading or lifting, because a worn line stops being read. UV-cured marking is applied and cured in place in seconds rather than needing hours or days to dry, which keeps a working area open while it is marked, and it is formulated to stand up to traffic and cleaning for years. Whatever the system, the marking should be inspected as part of the regular fire-safety checks and re-applied before it wears to the point of being unclear.
How do I set out escape-route floor marking?
- Establish the required clear width for each route, stair and exit from the occupancy and current fire guidance.
- Mark the walkway or route edges so that clear width is visible and maintainable, carried through stairs and thresholds.
- Add hatched keep-clear zones at exits, fire doors, firefighting equipment and electrical panels.
- Use ISO 7010 colours consistently, keep the marking durable enough to survive traffic and cleaning, and inspect and refresh it on the fire-safety schedule.
Frequently asked questions
What is the minimum width for an escape route?
A common minimum clear width is 1,000mm for a general workplace escape route, with 800mm the absolute minimum for the lowest-occupancy routes and wider minimums as the number of people served rises. The width must be kept unobstructed along the whole route, including stairs and doorways.How do you mark an escape route on the floor?
Mark the route edges with demarcation lines to show the required clear width, add hatched keep-clear zones at exits, fire doors and firefighting equipment, and use directional arrows to the exit. ISO 7010 colours are used, green for the escape route and red to protect fire equipment.What colour is used for escape routes?
Green is the ISO 7010 safe-condition colour used for escape routes and safe areas. Red marks fire and firefighting equipment that must be kept clear. Using the colours consistently means the floor marking reads the same way to everyone.How much clear space is needed in front of an electrical panel?
A clear working space is needed so the panel can be operated and isolated safely, commonly around one metre in front, and floor marking is the usual way to keep that zone from being blocked by storage. Confirm the exact figure for your installation.Can items be stored on an escape route?
No. The required clear width must be kept unobstructed along the whole route and at exits, so stock, pallets, bins and equipment must not encroach on it. Keep-clear floor marking makes any obstruction obvious before it becomes a hazard.
Sources and standards
- Technical Guidance Document B - Fire Safety (Ireland) - Irish guidance on means of escape, including route widths.
- ISO 7010 - safety signs and colours - Standard safety colours used in floor marking.
Marking out escape routes?
UV Line Marking applies durable, fast-curing floor marking for escape routes and keep-clear zones.